How to install CSF firewall on your CentOS/RHEL cpanel server

Introduction:
Firewall is a most popular security panel. It is easy to install and manage all security to our system, firewall helps to protect the server from virus attack. We are install firewall including cpanel user interface present in WHM known as ConfigServer Security & Firewall.
ConfigServer Security & Firewall is a popular open source Login/Intrusion Detection and Security application, compatible with most Linux servers. It used to blocks blacklisted IP addresses for secure our Linux server.
Features of ConfigServer Security & Firewall:
- Mod Security
- Open SSH
- Port Scan tracking and blocked IP Address
- Shared syslog aware
- Temporary Ip allow and deny
- Lots of feature…
- Exim SMTP Authority
CSF Installation Step:
Stpe1: Take SSH into your Linux server with root user.
Step2: CSF Installation Dependencies:
First you want to CSF dependencies, install perl packages. This is CSF dependency.
#yum install perl-libwww-perl -y
Step3: If in your system already existing CSF firewall available, then remove that CSF firewall, because you should not run same script on same server. Otherwise they will disagree with each other. Run Following command to remove existing CSF firewall.
#sh /tmp/csf/remove_apf_bfd.sh or #sh uninstall.sh
Step4: Go to your home directory and download CSF package.
#cd /home
#wget -N http://configserver.com/free/csf.tgz
Step5: Then uncompressing csf.tgz file and go to your uncompressed csf file, show below commands.
#tar –zxvf csf.tgz
#cd csf
Step6: Install CSF firewall. Wait a sometime because it takes some time, if any acceptance request you receive then enter “y”.
#sh install.sh
Congratulation, your CSF firewall has been install successfully.
Step7: Restart CSF service in testing mode.
#/etc/init.d/csf restart
Step8: Once you happy with your CSF installation and configuration. Then be sure to take your system CSF firewall disable testing mode by using your favorite editor to change csf.conf file.
#vi /etc/csf.conf
Find the Testing flag in your file TESTING = “1” changed to TESTING = “0”.
Step9: Restart your CSF service
#/etc/init.d/csf restart
Step10: If you have warning RESTRICT_SYSLOG disable, then edit “csf.conf” file.
#vi /etc/csf.conf
Find RESTRICT_SYSLOG = “0” and change to RESTRICT_SYSLOG = “3”
Step11: If you don’t know csf command you just type “csf” in command line.
#csf
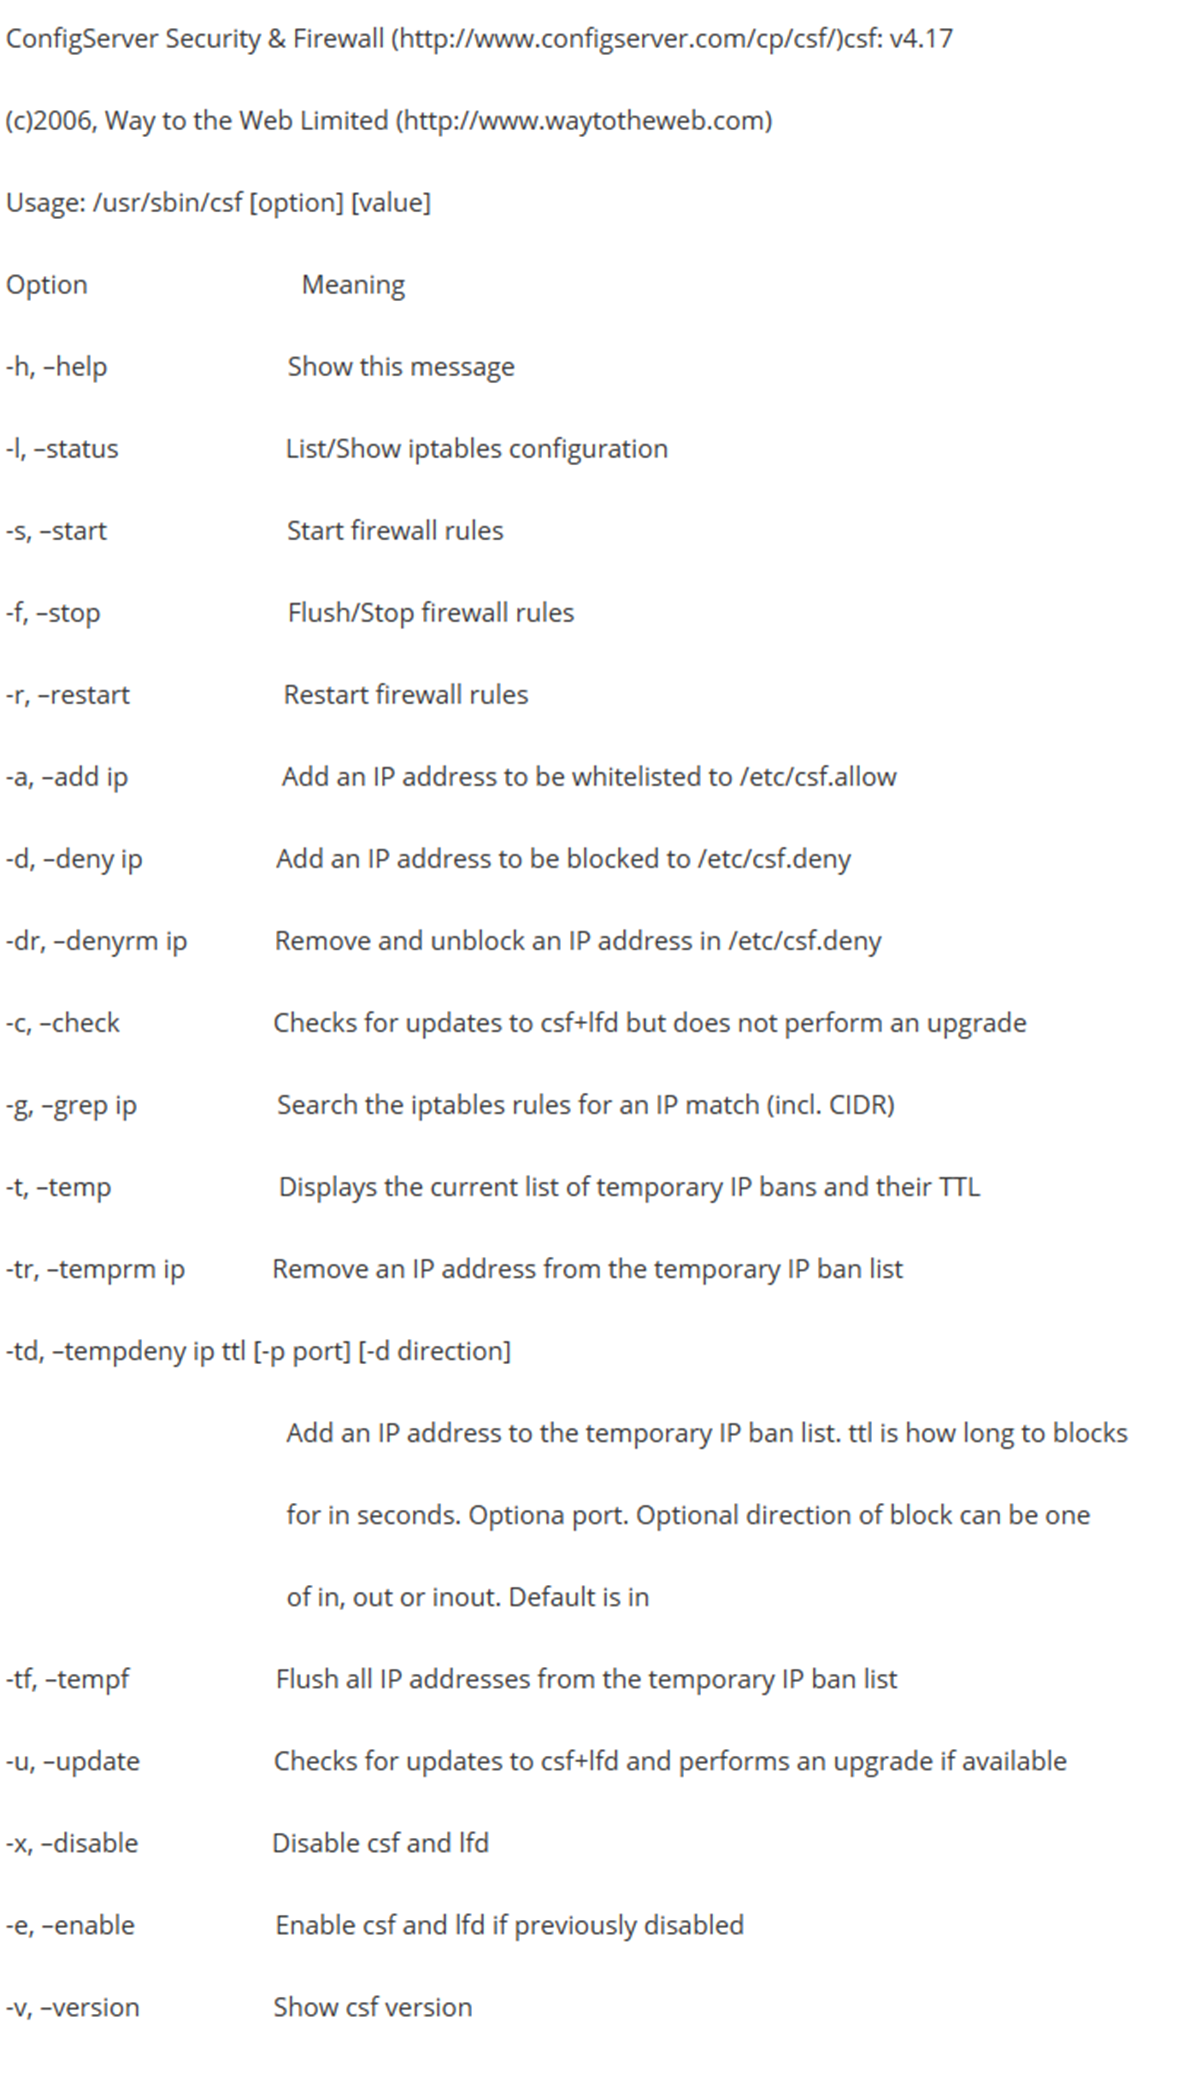
You will receive an list of all option read option and apply on our system.
For example:
1. Service csf restart option:
#csf –r
2. IP Address allow:
#csf –a 111.111.111.111